Introduction
Building your own computer may sound difficult at first, but it is much easier than many beginners think. A custom PC gives you the freedom to choose the exact parts you need for gaming, school, office work, editing, streaming, or creative projects. Instead of buying a prebuilt system with limited upgrade options, you can create a machine that matches your performance goals and budget.
A complete PC build guide for beginners can help you understand each component step by step. Once you learn the basics, building a computer becomes an enjoyable and rewarding experience. You also gain valuable technical knowledge that helps you upgrade and maintain your system in the future.
Another major advantage of building a PC is flexibility. You can start with affordable parts and upgrade later whenever needed. Whether you want a budget gaming setup or a powerful workstation, custom building allows you to control every detail.
This guide explains everything in simple language so beginners can confidently build their first computer without stress. From choosing parts to installing the operating system, every important step is covered clearly. By the end of this article, you will understand how to plan, assemble, and test your first PC successfully.
What is PC Build Guide for Beginners?
A PC build guide for beginners is a step-by-step explanation that teaches people how to assemble a custom computer using individual hardware components. Instead of buying a ready-made desktop, users purchase separate parts and combine them into one working system.
These guides are designed to simplify the building process for new users. They explain the purpose of every component and show how the parts connect together. A beginner-friendly guide usually includes:
- Information about computer components
- Hardware compatibility tips
- Assembly instructions
- Cable management basics
- Operating system installation steps
- Troubleshooting advice
Building a PC does not require advanced technical skills. With patience and proper guidance, most beginners can successfully assemble their first computer within a few hours.
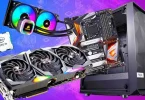
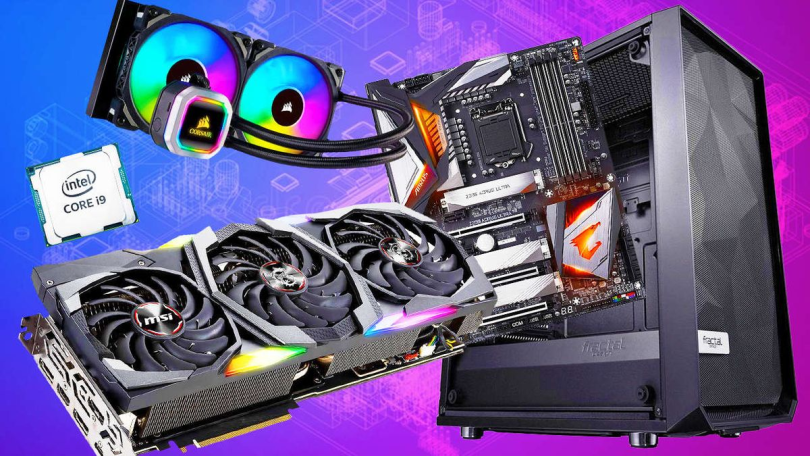
A typical custom PC includes the following parts:
- Processor or CPU
- Motherboard
- Graphics card or GPU
- RAM or memory
- Storage drive
- Power supply unit
- PC case
- Cooling system
Each part has a specific role in system performance. Understanding these components is the first step toward building a reliable computer.
Why is PC Build Guide for Beginners Important?
A good PC build guide for beginners is important because it helps users avoid confusion, expensive mistakes, and compatibility problems. Many first-time builders feel overwhelmed by technical terms and hardware choices. A detailed guide simplifies everything.
One important benefit is cost control. Beginners often overspend on unnecessary parts or buy components that do not work together. A guide helps users choose balanced hardware according to their budget and needs.
Another reason these guides matter is performance customization. Every user has different goals. Some people need a gaming computer, while others need a setup for video editing or office tasks. A proper guide helps users build a PC that fits their exact requirements.
Safety is also important during PC assembly. Incorrect installation can damage expensive parts. A beginner guide teaches proper handling methods, cable connections, and cooling setup.
In addition, learning how computers work builds confidence. Users who build their own systems often feel more comfortable upgrading storage, replacing parts, or fixing problems later.
Finally, a beginner guide saves time. Instead of searching for scattered information online, users can follow one organized process from start to finish.
Detailed Step-by-Step Guide
Step 1: Decide Your Budget and Purpose
Before buying any parts, decide how much money you want to spend and what tasks the computer will handle.
Common PC categories include:
- Budget office PC
- Gaming PC
- Streaming setup
- Content creation workstation
- School or college computer
For example, a gaming PC usually needs a stronger graphics card, while an office PC may focus more on storage and efficiency.
Creating a realistic budget prevents overspending. Beginners should always leave some money for accessories like a monitor, keyboard, mouse, and operating system.
Step 2: Choose the Right Processor
The processor, also called the CPU, is the brain of the computer. It handles calculations, multitasking, and software operations.
Popular CPU brands include:
- Intel
- AMD
When selecting a processor, consider:
- Core count
- Clock speed
- Power efficiency
- Compatibility with the motherboard
For beginners, mid-range processors are usually the best choice because they provide strong performance without high costs.
A gaming system benefits from a modern multi-core processor that works well with current graphics cards.
Step 3: Select a Compatible Motherboard
The motherboard connects all hardware components together. Every part in the computer communicates through the motherboard.
When choosing a motherboard, check:
- CPU socket compatibility
- RAM support
- Storage slots
- USB ports
- Expansion slots
- Wi-Fi capability
A common mistake beginners make is buying a motherboard that does not support their processor. Always confirm compatibility before purchasing.
ATX motherboards offer more features and expansion slots, while Micro-ATX boards are smaller and budget friendly.
Step 4: Install the Right Amount of RAM
RAM helps the computer run multiple applications smoothly. More memory improves multitasking and system responsiveness.
Recommended RAM sizes:
- 8GB for basic use
- 16GB for gaming and multitasking
- 32GB or more for editing and professional workloads
Most modern systems use DDR4 or DDR5 memory. Beginners should always verify motherboard compatibility before buying RAM.
Installing RAM is simple. Align the memory stick with the slot and press firmly until the clips lock into place.
Step 5: Choose Fast Storage
Storage drives keep your operating system, games, files, and applications.
There are two common storage types:
- SSD
- HDD
Solid-state drives are much faster than traditional hard drives. They improve boot times and overall system speed.
Many beginners use:
- SSD for Windows and applications
- HDD for extra storage
NVMe SSDs are especially fast and ideal for gaming and professional work.
Step 6: Pick a Suitable Graphics Card
The graphics card is one of the most important components for gaming, streaming, and creative tasks.
A powerful GPU improves:
- Gaming performance
- Video editing
- 3D rendering
- Streaming quality
Popular GPU manufacturers include NVIDIA and AMD.
Beginners should choose a graphics card based on monitor resolution and gaming goals. Buying an extremely expensive GPU for basic gaming is often unnecessary.
Always check whether the graphics card fits inside the PC case.
Step 7: Buy a Reliable Power Supply
The power supply unit, or PSU, delivers electricity to every component.
A low-quality PSU can damage expensive hardware, so this part should never be ignored.
Look for:
- Trusted brands
- 80 Plus certification
- Enough wattage
- Cable quality
Most beginner gaming PCs work well with a 550W to 750W power supply.
Modular PSUs are easier for cable management because unnecessary cables can be removed.
Step 8: Select the Right PC Case
The PC case holds all components and affects airflow, cooling, and appearance.
Important factors include:
- Airflow design
- Cable management space
- GPU clearance
- Fan support
- Size compatibility
Good airflow helps keep temperatures low during gaming or heavy workloads.
Many beginners choose cases based only on looks, but airflow and build quality are far more important.
Step 9: Install Cooling Components
Cooling keeps computer temperatures safe and stable.
Most CPUs include a stock cooler, which is usually enough for beginner builds. However, stronger systems may benefit from aftermarket air coolers or liquid cooling.
Apply thermal paste carefully before attaching the cooler.
Proper airflow setup generally includes:
- Front intake fans
- Rear exhaust fans
- Top exhaust fans
Balanced airflow improves long-term system performance.
Step 10: Prepare Your Workspace
Before building, organize a clean and safe workspace.
You should have:
- A screwdriver
- Small containers for screws
- Good lighting
- Enough desk space
- Anti-static precautions
Avoid building on carpet because static electricity can damage components.
Reading the motherboard manual beforehand also helps beginners understand connector locations.
Step 11: Install the CPU on the Motherboard
Open the CPU socket carefully and align the processor correctly.
Never force the processor into place. Most CPUs fit easily when aligned properly.
After installation:
- Lock the socket
- Apply thermal paste if necessary
- Install the CPU cooler
This is one of the most delicate steps, so patience is important.
Step 12: Install RAM and Storage
Insert the RAM sticks into the correct motherboard slots according to the manual.
Next, install the storage drive.
For NVMe SSDs:
- Insert the drive into the M.2 slot
- Secure it with a screw
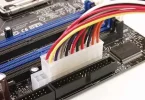
For SATA drives:
- Connect data cables
- Connect power cables
Double-check every connection before moving forward.
Step 13: Place the Motherboard Inside the Case
Install motherboard standoffs inside the case first.
Carefully lower the motherboard into position and align it with the rear I/O shield.
Secure the board with screws but avoid overtightening.
Take your time because rushing can damage connectors or scratch the motherboard.
Step 14: Install the Power Supply
Place the PSU in the correct compartment and secure it with screws.
Connect:
- Motherboard power cable
- CPU power cable
- GPU power cable
- Storage power cables
Neat cable routing improves airflow and makes future upgrades easier.
Step 15: Install the Graphics Card
Insert the graphics card into the main PCIe slot.
Press gently until it clicks into place.
Secure the card with screws and connect required power cables.
Large graphics cards may need additional support brackets.
Step 16: Connect Front Panel Cables
Front panel connectors control:
- Power button
- Reset button
- USB ports
- Audio jacks
This step can feel confusing for beginners, but the motherboard manual clearly labels every connector.
Patience is important during this stage.
Step 17: Test the System
Before closing the side panel, test the computer.
Turn on the system and check:
- Fans spinning
- Display output
- BIOS startup
- Temperature readings
If the system does not boot, recheck cable connections and RAM installation.
Step 18: Install the Operating System
After successful testing, install your operating system.
Most users choose Windows because of gaming and software compatibility.
Installation steps include:
- Create a bootable USB drive
- Enter BIOS settings
- Set USB as boot priority
- Follow installation instructions
After installation, update drivers and system software.
Step 19: Install Essential Programs
A new computer needs important software for productivity and security.
Useful applications include:
- Web browsers
- Antivirus software
- Game launchers
- Editing programs
- Hardware monitoring tools
Keeping software updated improves performance and stability.
Step 20: Maintain Your PC Regularly
Building the PC is only the beginning. Regular maintenance helps the system last longer.
Maintenance tips include:
- Cleaning dust filters
- Updating drivers
- Monitoring temperatures
- Organizing cables
- Checking storage health
Good maintenance keeps the computer running smoothly for years.
Benefits of PC Build Guide for Beginners
Building a custom computer offers many advantages.
- Better performance for your budget
- Full control over component selection
- Easier future upgrades
- Improved understanding of computer hardware
- Better cooling and airflow options
- More storage flexibility
- Personal customization choices
- Sense of achievement after completing the build
- Ability to troubleshoot basic issues independently
- Longer upgrade lifespan compared to many prebuilt systems
Many beginners discover that custom PCs deliver better long-term value than prebuilt computers.
Disadvantages / Risks
Although building a PC has many benefits, beginners should also understand the possible challenges.
- Initial learning curve can feel overwhelming
- Compatibility mistakes may occur
- Incorrect installation can damage hardware
- Cable management may take extra time
- Some parts can be expensive
- Troubleshooting boot problems requires patience
- Warranty coverage differs between manufacturers
- Shipping delays can slow the building process
- BIOS updates may occasionally be necessary
- Poor airflow setup can increase temperatures
Most of these risks can be reduced through careful planning and research.
Common Mistakes to Avoid
Ignoring Compatibility
Always verify that the motherboard, CPU, RAM, and case work together.
Buying Cheap Power Supplies
A low-quality PSU can damage the entire system. Invest in a trusted brand.
Forgetting Thermal Paste
Without proper thermal paste, CPU temperatures may become dangerously high.
Poor Cable Management
Messy cables block airflow and make future upgrades difficult.
Overspending on One Component
A balanced build performs better than spending most of the budget on a single part.
Skipping Driver Updates
Outdated drivers can reduce performance and cause system instability.
Installing Components Forcefully
Never force hardware into slots. Components should fit naturally.
Not Testing Before Closing the Case
Always perform a test boot before final assembly.
Ignoring Airflow
Good airflow improves cooling and extends hardware lifespan.
Rushing the Build
Patience helps prevent mistakes and hardware damage.
FAQs
1. Is building a PC difficult for beginners?
No, building a PC is manageable for most beginners if they follow a detailed guide carefully. Modern computer parts are designed to fit together easily, and many manufacturers provide clear instructions.
2. How long does it take to build a first PC?
Most beginners complete their first build within three to six hours. The exact time depends on preparation, cable management, and troubleshooting.
3. Is building a PC cheaper than buying a prebuilt computer?
In many cases, yes. A custom build often provides better performance for the same budget because users avoid extra assembly and branding costs.
4. What tools are needed to build a PC?
The most important tool is a Phillips screwdriver. Builders may also use cable ties, thermal paste, and anti-static equipment.
5. Can I upgrade my PC later?
Yes, one major advantage of a custom build is upgrade flexibility. Users can replace the GPU, add storage, increase RAM, or upgrade cooling later.
6. What happens if my PC does not turn on?
Check all power connections, RAM placement, and front panel connectors. Many startup problems are caused by loose cables or incorrect installation.
7. How much RAM should a beginner gaming PC have?
For most modern games, 16GB of RAM is a balanced and reliable choice.
8. Do I need a graphics card for every PC?
Not always. Some processors include integrated graphics that are suitable for office work, browsing, and basic tasks.
Expert Tips & Bonus Points
Research every component carefully before buying anything. Watching build videos and reading motherboard manuals can make the process much easier.
Choose a case with strong airflow rather than focusing only on RGB lighting or appearance.
If possible, buy parts from reliable sellers with good warranty policies.
Always organize screws and accessories during assembly. Losing small parts can slow down the build.
Keep your operating system and drivers updated for better security and performance.
Do not ignore cable management. Clean cable routing improves airflow and gives the system a professional appearance.
When building a gaming PC, prioritize the graphics card because it strongly affects gaming performance.
Beginners should avoid extreme overclocking until they understand cooling, voltage, and hardware stability.
Use monitoring software to track temperatures and fan speeds after the build is complete.
Finally, stay patient during troubleshooting. Even experienced builders occasionally encounter boot issues or cable mistakes.
Conclusion
A complete PC build guide for beginners makes the process of building a custom computer far less intimidating. Although assembling a computer may seem complicated at first, the process becomes much easier when broken into clear steps. By understanding each component and following proper installation methods, beginners can successfully create a reliable and high-performing system.
Building your own PC offers many long-term benefits. You gain better performance for your budget, full customization freedom, and valuable technical knowledge. In addition, custom computers are easier to upgrade and maintain compared to many prebuilt systems.
Planning carefully is the key to success. Choosing compatible parts, using a reliable power supply, maintaining proper airflow, and testing the system thoroughly can prevent most beginner mistakes. Patience is also important because rushing often leads to installation errors.
The experience of powering on a self-built computer for the first time is extremely rewarding. Whether your goal is gaming, content creation, office productivity, or learning new technical skills, building a PC is an investment that provides both practical value and personal satisfaction.
With the help of this PC build guide for beginners, you now have the knowledge needed to start your first custom computer project confidently. Take your time, follow each step carefully, and enjoy the process of building a machine designed specifically for your needs.