Introduction
Building a personal computer may seem complicated at first, but it is actually one of the most rewarding experiences for technology enthusiasts and beginners alike. A custom-built PC gives you complete control over performance, budget, appearance, and future upgrades. Whether you want a computer for gaming, content creation, office work, programming, or everyday tasks, building your own PC can help you achieve better value compared to many pre-built systems.
A proper PC Build Guide helps beginners understand the purpose of each component and how everything works together. Instead of relying on expensive pre-assembled computers, you can choose parts that fit your exact needs and budget. Modern PC hardware has become more user-friendly than ever, making the building process accessible even to first-time users.
During the planning stage, many builders use free SEO tools to research trending hardware reviews, compare specifications, and find reliable product information online. While these tools are mainly known for digital marketing, they can also help identify popular products and trusted technology resources.
This comprehensive PC Build Guide covers everything from selecting components and assembling hardware to avoiding common mistakes and optimizing performance. By the end of this guide, you’ll have the confidence to build your own computer successfully.
What is a PC Build Guide?
A PC Build Guide is a detailed set of instructions that explains how to select compatible computer components and assemble them into a fully functional system. It serves as a roadmap for beginners who want to build a computer instead of purchasing a pre-built machine.
The guide typically covers essential components such as the processor, motherboard, memory, graphics card, storage devices, power supply, cooling solutions, and computer case. It also explains installation procedures, compatibility requirements, troubleshooting methods, and optimization techniques.
Following a structured PC Build Guide helps users avoid costly mistakes, improve performance, and ensure all components work together correctly. Whether you’re building a budget workstation or a high-end gaming rig, a reliable guide simplifies the entire process.
Why is a PC Build Guide Important?

A PC Build Guide is important because it helps users make informed decisions before spending money on expensive hardware. Without proper guidance, beginners often purchase incompatible components or overlook critical specifications that can impact performance.
The guide also reduces the risk of hardware damage during installation. Understanding where each component belongs and how it should be connected improves safety and efficiency throughout the building process.
Additionally, a PC Build Guide helps maximize value. Instead of overspending on unnecessary features, users can allocate their budget toward components that provide the greatest performance benefits. This approach leads to better long-term satisfaction and easier future upgrades.
Detailed Step-by-Step Guide
Step 1: Define Your Purpose
Before purchasing any components, determine how the computer will be used.
Common purposes include:
- Gaming
- Video editing
- Graphic design
- Programming
- Streaming
- Office productivity
- General browsing
Your intended use directly influences component selection and budget allocation.
Step 2: Set Your Budget
A clear budget prevents overspending and helps prioritize important components.
Typical budget categories:
- Entry-level: $500–$800
- Mid-range: $800–$1,500
- High-end: $1,500–$3,000
- Enthusiast level: $3,000+
Researching component prices with online comparison websites and free SEO tools can help identify the best deals available.
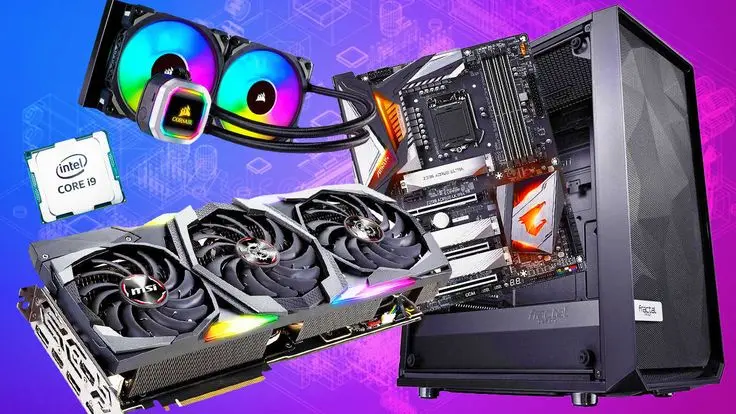
Step 3: Choose the CPU
The Central Processing Unit (CPU) serves as the brain of the computer.
Popular options include:
- Intel Core i5
- Intel Core i7
- Intel Core i9
- AMD Ryzen 5
- AMD Ryzen 7
- AMD Ryzen 9
Beginners typically find Intel Core i5 and AMD Ryzen 5 processors sufficient for most workloads.
Step 4: Select a Compatible Motherboard
The motherboard connects all components together.
Important considerations include:
- CPU socket compatibility
- RAM support
- Expansion slots
- USB ports
- Storage connections
- Wi-Fi capabilities
Always verify that the motherboard supports your chosen processor.
Step 5: Install RAM
Random Access Memory (RAM) affects multitasking performance.
Recommended capacities:
- 8GB for basic tasks
- 16GB for gaming
- 32GB for content creation
- 64GB+ for professional workloads
Install memory modules into the correct motherboard slots according to the manufacturer’s instructions.
Step 6: Choose Storage
Modern PCs generally use SSDs because they provide faster performance.
Storage options include:
- SATA SSD
- NVMe SSD
- HDD
Recommended configuration:
- 500GB or 1TB NVMe SSD for operating system
- Additional HDD for large file storage
Step 7: Select a Graphics Card
The Graphics Processing Unit (GPU) handles visual rendering.
Popular options include:
- NVIDIA GeForce RTX series
- AMD Radeon RX series
For gaming and content creation, investing in a quality GPU significantly improves performance.
Step 8: Choose a Power Supply
The Power Supply Unit (PSU) delivers electricity to all components.
Recommended features:
- 80 Plus certification
- Reliable brand reputation
- Sufficient wattage
- Modular cable design
A high-quality PSU improves system stability and longevity.
Step 9: Select a PC Case
The case houses and protects all hardware components.
Important factors include:
- Airflow design
- Size compatibility
- Cable management
- Dust filters
- Expansion support
Good airflow contributes to lower operating temperatures.
Step 10: Install CPU
Carefully place the processor into the motherboard socket.
Avoid applying excessive pressure. Most modern CPUs align easily using built-in orientation markers.
Secure the retention mechanism according to manufacturer instructions.
Step 11: Apply Thermal Paste
Thermal paste improves heat transfer between the CPU and cooler.
Many coolers include pre-applied thermal compound. If not, apply a small pea-sized amount to the center of the processor.
Step 12: Install CPU Cooler
Attach the cooling solution according to the manufacturer’s instructions.
Ensure firm and even contact with the processor surface for optimal cooling performance.
Step 13: Install RAM Modules
Insert memory sticks into designated motherboard slots.
Press firmly until both retention clips lock into place.
Step 14: Mount Motherboard
Install motherboard standoffs before mounting.
Secure the motherboard using appropriate screws without overtightening.
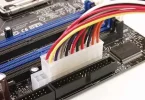
Step 15: Install Storage Drives
Mount SSDs and HDDs in their designated locations.
Connect:
- Power cables
- Data cables
- NVMe drives directly to motherboard slots
Step 16: Install Graphics Card
Insert the GPU into the primary PCIe slot.
Secure it with screws and connect any required power cables.
Step 17: Install Power Supply
Position the PSU correctly according to case design.
Connect cables to:
- Motherboard
- CPU
- Graphics card
- Storage devices
Step 18: Manage Cables
Proper cable management improves airflow and aesthetics.
Use cable ties to secure loose wires and maintain a clean internal layout.
Step 19: Power On the System
Connect:
- Monitor
- Keyboard
- Mouse
- Power cable
Press the power button and verify all components initialize correctly.
Step 20: Install Operating System
Install your preferred operating system.
After installation:
- Update drivers
- Update firmware
- Configure settings
- Install essential software
Benefits of PC Build Guide
A well-structured PC Build Guide offers numerous advantages:
- Better understanding of computer hardware
- Cost savings compared to many pre-built systems
- Complete customization options
- Easier future upgrades
- Improved troubleshooting knowledge
- Enhanced system performance
- Greater satisfaction from building your own computer
- Better component quality control
- More efficient budget allocation
- Increased technical skills
Disadvantages / Risks
Despite its advantages, building a PC also has some challenges:
- Initial learning curve
- Possibility of compatibility issues
- Risk of improper installation
- Time-consuming research process
- Potential troubleshooting difficulties
- Component shortages during high-demand periods
- Warranty management across multiple manufacturers
- Risk of static electricity damage
- Higher upfront planning requirements
Common Mistakes to Avoid
One of the most common mistakes beginners make is purchasing incompatible components. Always verify motherboard socket compatibility, memory support, and power requirements before placing an order.
Another frequent error involves choosing a low-quality power supply. A cheap PSU can lead to instability, component damage, and reduced lifespan. Investing in a reputable power supply manufacturer is essential.
Many first-time builders also neglect airflow planning. Poor cooling can cause thermal throttling and reduced performance. Ensure sufficient intake and exhaust fans are installed within the case.
Cable management is another overlooked area. Disorganized cables restrict airflow and make future upgrades more difficult. Spending extra time organizing cables can significantly improve overall system maintenance.
Finally, rushing the assembly process often leads to mistakes. Read manuals carefully, verify connections twice, and proceed methodically throughout the build.
FAQs
1. Is building a PC difficult for beginners?
No. Modern computer components are designed for easy installation. Following a detailed PC Build Guide allows most beginners to assemble a computer successfully.
2. How much does it cost to build a gaming PC?
The cost depends on performance goals. Entry-level gaming PCs often start around $700, while high-end systems can exceed $2,000.
3. Is a custom-built PC better than a pre-built PC?
Custom-built PCs often provide better value, customization, upgrade flexibility, and component quality compared to many pre-built alternatives.
4. How long does it take to build a PC?
Most beginners complete their first build within three to six hours. Experienced builders often finish in under two hours.
5. Do I need special tools to build a PC?
A Phillips-head screwdriver is usually the primary tool required. Additional tools may help with cable management but are not mandatory.
6. How often should a PC be upgraded?
Most systems remain effective for several years. Storage, RAM, and graphics cards are commonly upgraded every three to five years depending on usage requirements.
7. Can I build a PC without a graphics card?
Yes. Some processors include integrated graphics that support basic computing tasks without a dedicated GPU.
8. What component affects gaming performance the most?
For most gaming systems, the graphics card has the greatest impact on frame rates and visual quality.
Expert Tips & Bonus Points
Research thoroughly before purchasing components. Reading professional reviews and comparing benchmarks helps identify the best value options.
Choose quality over flashy aesthetics. Reliable components provide better long-term performance than decorative features that add little functionality.
Keep firmware and drivers updated regularly. Updates often improve stability, security, and performance.
Invest in adequate cooling from the beginning. Lower temperatures contribute to longer hardware lifespan and more consistent performance.
Plan for future upgrades. Selecting a capable motherboard and power supply today can save money when expanding the system later.
Use anti-static precautions during assembly. Working on a non-carpeted surface and grounding yourself reduces the risk of electrostatic discharge.
Monitor temperatures after the build is complete. Software tools can help identify cooling issues before they become serious problems.
Conclusion
Building your own computer is one of the most valuable skills a technology enthusiast can learn. While the process may appear intimidating initially, a structured PC Build Guide simplifies every stage from component selection to final system optimization. By understanding the role of each component and following proper installation procedures, beginners can create powerful, reliable, and fully customized computers tailored to their specific needs.
The benefits extend far beyond cost savings. Custom PC builders gain deeper technical knowledge, greater upgrade flexibility, and improved troubleshooting capabilities. They also enjoy complete control over performance, aesthetics, and future expansion possibilities. Although there are risks such as compatibility issues and installation mistakes, careful planning and patience significantly reduce these challenges.
As technology continues to evolve, building a PC remains one of the best ways to maximize value and performance. Whether your goal is gaming, content creation, professional work, or everyday computing, investing time in learning the fundamentals will pay dividends for years to come. With the information provided in this guide, you now have a solid foundation to confidently begin your first PC-building journey.